How to Save an Overwatered Plant from Root Rot (UK Guide)
If your plant is looking rough, our Houseplant Troubleshooting: How to Save a Dying Plant hub covers the full diagnostic process. This article focuses on one particular problem.
This page contains affiliate links. As an Amazon Associate we earn from qualifying purchases — this does not affect the price you pay.
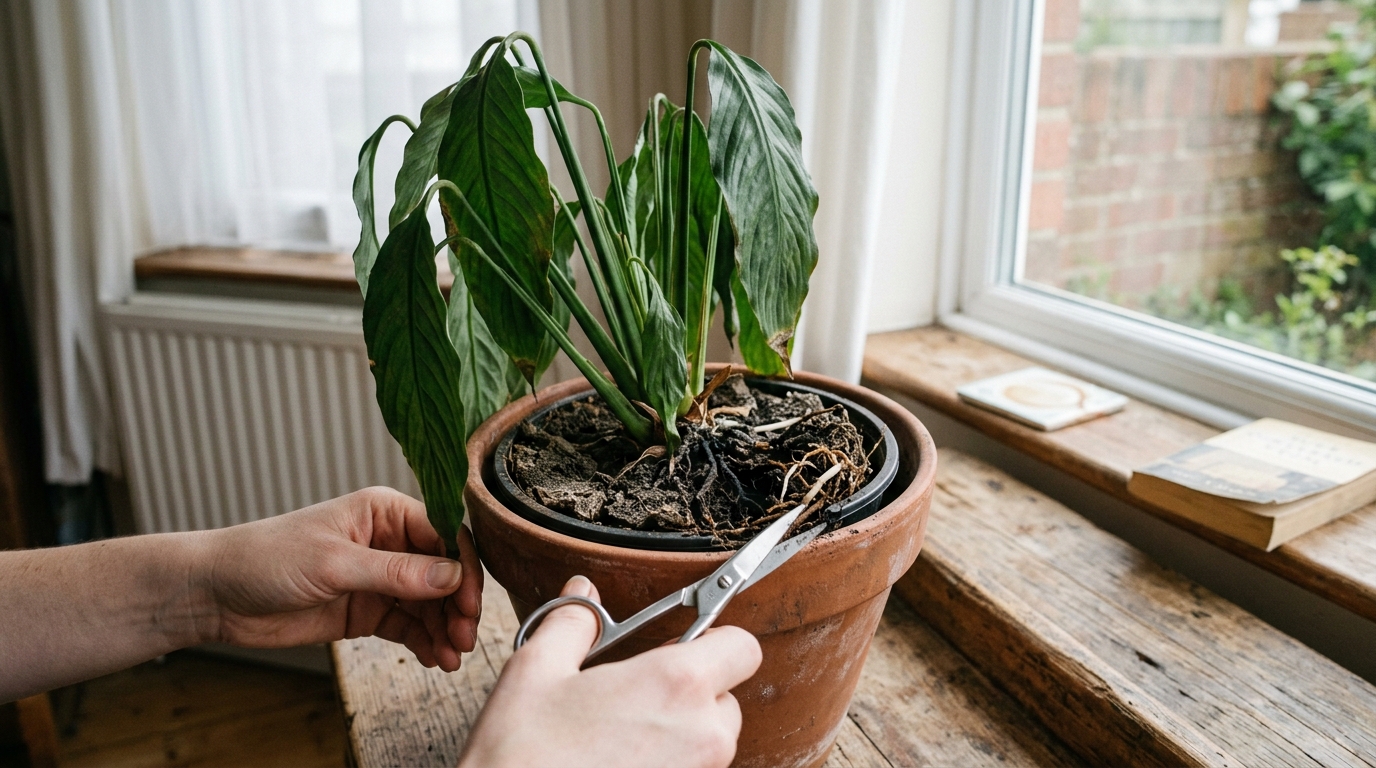
You’ve watered your peace lily three days in a row, the leaves are drooping, and the soil smells slightly like a stagnant pond. That “water once a week” schedule you found online is a recipe for disaster in a British flat with hard tap water and central heating. Overwatering invites root rot, but it isn’t an automatic death sentence if you catch it quickly.
Stop watering straight away and pull the plant out of its pot to inspect the roots. Trim away any brown, mushy roots with sterilised scissors, leaving only the firm, white ones. Give the healthy roots a brief dip in a diluted hydrogen peroxide solution, then repot the plant in fresh, well-draining peat-free mix using a pot with drainage holes. Keep the soil just moist enough to pass the finger test, use room-temperature water, and provide bright, indirect light. You should see signs of recovery within a week or two, provided the rot hasn’t reached the base of the stem. Catching it early and completely replacing the soggy soil is the only way to stop the fungal infection from spreading.
Step 1: Stop Watering Immediately
Don’t water a plant that’s showing signs of root rot until the top inch of soil is bone-dry. Watering more just suffocates the roots further, turning a soggy mess into a permanent swamp. In a flat where the central heating dries the surface quickly, it’s easy to mistake a dry crust for a dry root zone. This classic false recovery tricks you into a second watering before the plant finally collapses.
Give the soil at least a week to dry out completely. You might need to poke a finger in to be sure it feels dry to the touch. The “wait and see” period can be one to two weeks before you notice any perk-up.
It’s easy to think a monstera is thirsty because the topsoil looks dry, when it’s actually drowning. Stopping watering meant the leaves lifted a notch after a week — a clear sign the plant was still alive.
If you are struggling to read the signs, having a look through the other troubleshooting guides on the blog might help you spot the difference between a thirsty plant and a drowning one.
Step 2: How can you tell if your plant has root rot?
Pull the plant out of its pot and inspect the root system directly. Healthy houseplant roots are white or light tan, firm, and snap back when you give them a gentle tug. Diseased roots look brown or black, feel mushy, and may ooze a slimy film that smells like a stagnant pond.
If the stem at the base of the plant is black or feels soft to the touch, the rot has reached the crown. That is usually a sign it’s beyond rescue. This differentiator is often missed in forum advice, where people keep watering hoping a rotting stump will miraculously bounce back.
Imagine a root ball that looks like wet cardboard versus a healthy, white network — the contrast is stark.
A soft, blackened stem on a peace lily is a bad sign worth noticing early — even if the leaves are still green, a mushy stem usually means it’s too late, which at least saves you the faff of a futile repot.
According to the Royal Horticultural Society, root rot is caused by fungi that thrive in water-logged, poorly aerated soil. The RHS notes that early detection and removal of affected roots are essential to stop it spreading.
Step 3: The Root Wash – Clean and Prune
Now comes the critical step: wash and prune the roots without damaging the healthy ones.
Follow this process to clean up the root ball:
- Shake off loose soil: Give the pot a gentle tap and let excess dirt fall away into a bin bag.
- Rinse under lukewarm tap water: Use water that isn’t ice-cold; a quick rinse will loosen any remaining soggy soil without shocking the plant.
- Trim mushy roots: With a pair of sterilised scissors, cut away every brown, slimy piece. Aim to leave only crisp, firm roots.
- Sanitise the healthy roots: Dip them in a solution of one part 3% hydrogen peroxide to three parts water for about a minute. This kills residual fungus and gives the roots a fresh start.
We’ve found the hydrogen peroxide dip a lifesaver, especially when the rot was only moderate. It’s a cheap trick — a small bottle costs roughly £2 from a high street pharmacy — and worth the investment for a struggling plant.
After the wash, let the roots air-dry for a few minutes. Do not let them sit in standing water. Then move straight to repotting.
Step 4: Repot and Recover
Repot into LE TAUCI Ceramic Plant Pots with Drainage (paid link) — the drainage hole is properly sized and the saucer catches any excess without letting the roots sit in a puddle.
Check LE TAUCI Ceramic Plant Pots with Drainage price → (paid link)
Fresh, well-draining potting mix is non-negotiable. Old soil often retains excess moisture and harbours lingering fungal spores. Use a peat-free houseplant mix with added perlite or grit to improve aeration.
- Choose a pot with drainage holes. A decorative pot without holes is a death sentence for a recovering plant because water will just pool at the bottom.
- Place the plant in bright, indirect light. Direct sun can scorch the leaves, especially when the root system is compromised and weak.
- Water sparingly. Return to the finger test: only water when the top inch or two feels completely dry.
- Use room-temperature water. Cold tap water in winter can shock the roots and exacerbate rot. If you live in a hard water area, let the water sit overnight or use rainwater to avoid limescale buildup stressing the plant further.
Here’s a quick checklist of what you will need:
- Sharp, sterilised scissors
- A new plastic nursery pot (usually around £2 to £5)
- Fresh, well-draining soil (in the region of £5 to £8 for a small bag)
- A small bowl for the hydrogen peroxide dip
Repotting a snake plant in a new, hole-filled pot after a root wash typically sends out fresh shoots within three weeks — proof that the protocol works.
Root Health Reference Data
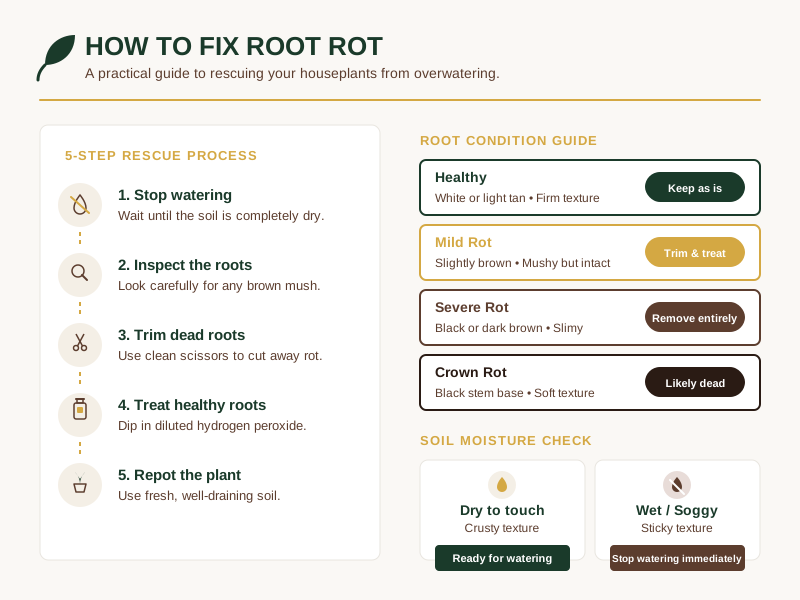
| Root Condition | Appearance | Texture | Action Required |
|---|---|---|---|
| Healthy | White or light tan | Firm, snaps back | Keep as is |
| Mild Rot | Slightly brown | Mushy but intact | Trim and treat |
| Severe Rot | Black or dark brown | Slimy, breaks apart | Remove completely |
| Crown Rot | Black stem base | Soft to touch | Plant is likely dead |
| Soil Moisture | Dry to touch | Crusty surface | Ready for watering |
| Soil Moisture | Wet/soggy | Sticky, heavy | Stop watering immediately |
What to Do Now
If you are dealing with related issues, see our guide to Why Are My Plant Leaves Turning Yellow?. Root rot is a nasty surprise, but with the right steps you can pull your plant back from the brink. Stop watering, confirm the diagnosis, give the roots a proper wash and prune, then repot in a breathable mix and a pot with drainage. Keep an eye on the soil moisture, use room-temperature water, and give the plant plenty of indirect light.
Now you’ve got a clear, UK-tailored rescue protocol in your toolbox.
Hang in there; a little patience and the right technique can turn a soggy disaster into a thriving plant on your windowsill. If the plant perks up within a week but then wilts again, check the drainage holes — a blocked saucer is the most common reason a rescue fails at the second hurdle.
Related Guides
For a complete overview, see our Houseplant Troubleshooting: How to Save a Dying Plant.
References
Note: This guide provides general information on plant care. Always verify specific advice with a qualified horticulturist or official botanical sources.