How to Save a Dying Houseplant After Using Bad Soil
eBay Partner Network: we earn a commission when you buy through eBay links on this page.
This page contains affiliate links. As an Amazon Associate we earn from qualifying purchases — this does not affect the price you pay.
This guide is part of our Houseplant Pests UK: How to Identify and Eradicate Bugs series — practical advice for keeping houseplants alive in British homes.
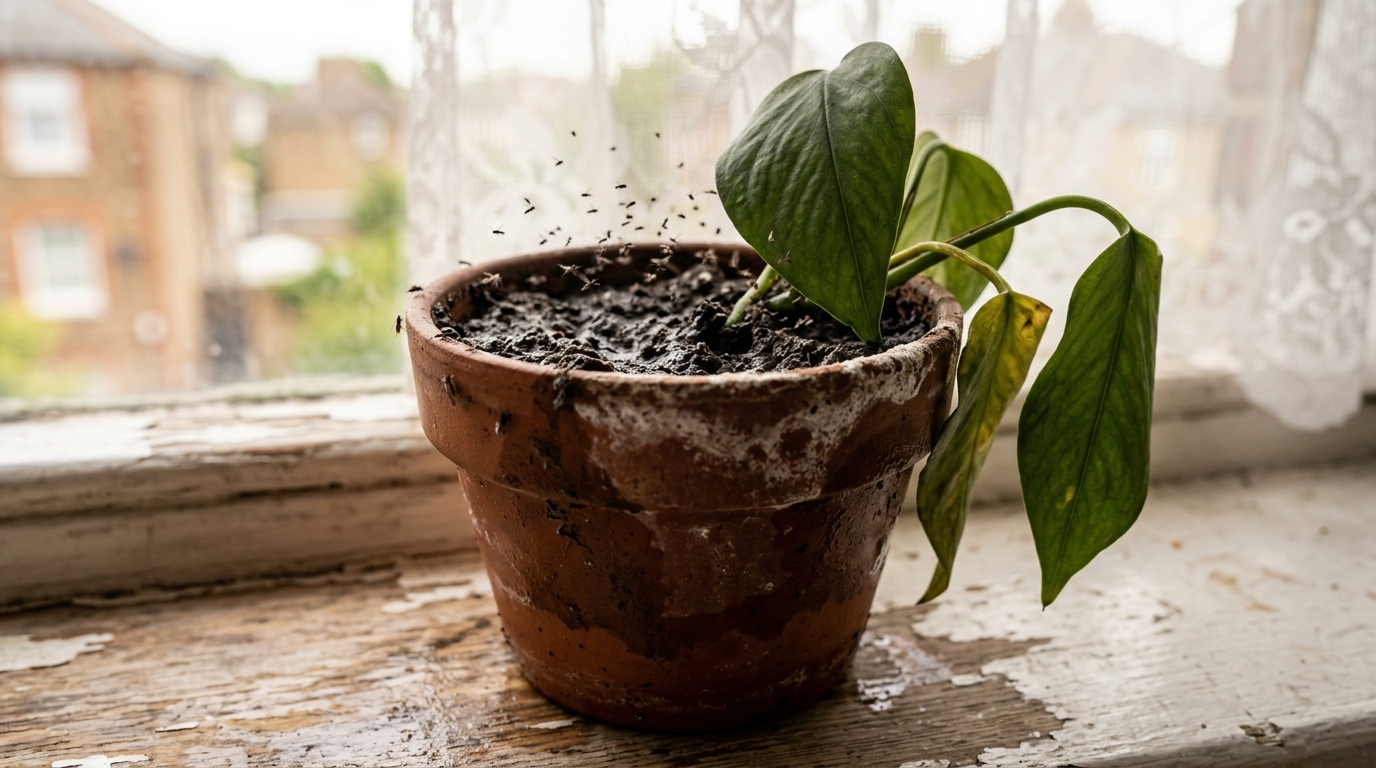
Repotting a monstera with a supposedly “premium” compost and then watching the leaves go yellow a week later is one of the more dispiriting experiences in plant keeping. Add a cloud of fungus gnats doing circuits above the pot and it feels like a proper disaster. In a centrally-heated UK flat, many peat-free mixes hold water far too long — roots suffocate, hard water salts accumulate, and the plant deteriorates fast. The good news is it isn’t a death sentence. A root wash and a switch to a better-draining mix will sort it out.
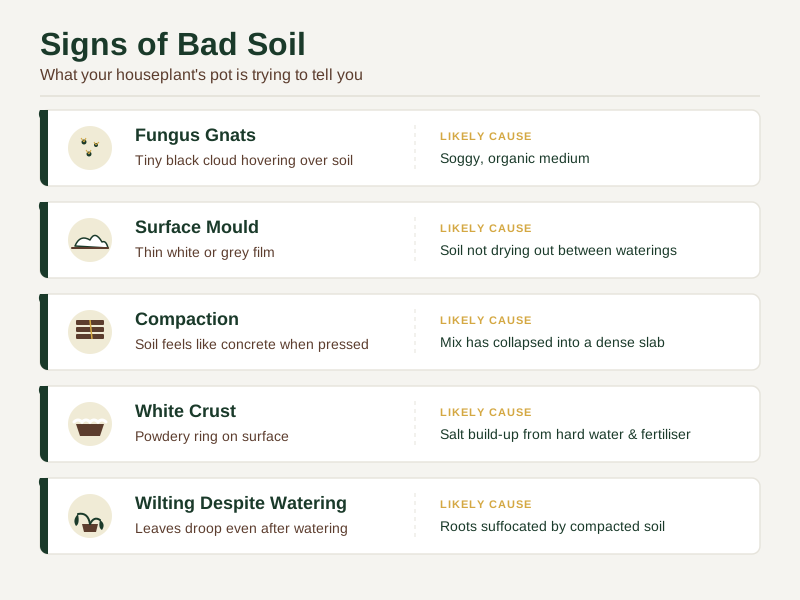
Quick reference: See the infographic below for a visual summary of the key points, or download the data table for full details.
Signs You’ve Got Bad Soil (And Why It Matters)
Bad soil usually gives you a clear set of warning signs, and spotting any of them means you’re on the right track to fixing the problem.
- Fungus gnats buzzing – they love a soggy, organic medium. If you see a tiny black cloud hovering over the surface, the soil is staying wet far too long.
- Mould on the top – a thin white or grey film is a classic indicator that the compost isn’t drying out between waterings, especially common in north-facing flats with limited airflow.
- Compaction – when you press a finger into the pot and it feels like concrete, the mix has collapsed into a dense slab. Roots can’t breathe, and you’ll see wilting despite regular watering.
- White crust on the surface – that powdery ring is salt build-up, a nasty combo of hard tap water and any fertiliser you’ve added. In the UK, many homes have hard water, so limescale and salts can accumulate quickly.
This happens a lot after repotting a pothos with a budget peat-free mix from a local DIY store. The plant started drooping within days and a fine white crust appeared on the soil. The culprit? The mix held water like a sponge while the hard water left mineral deposits. Switching to a better-draining blend solved it within a fortnight.
If you ignore these signs, the roots will suffocate, leading to root rot – a slow, invisible killer that often goes unnoticed until the leaves are already brown and mushy.
The “Root Rescue” Protocol: Step-by-Step
You can’t just dump the plant into fresh soil and hope for the best. You need a systematic rescue plan that tackles the underlying issues.
Step 1 – The Root Wash
Start by gently removing the plant from its pot. Hold the base of the stem, turn the pot upside down, and give the soil a light shake. If the medium clings stubbornly, rinse the roots under lukewarm tap water (around 20°C). Use a soft brush or your fingers to dislodge any remaining clumps. A quick rinse with cold water can send a plant into shock – the roots need a gentle, warm wash.
Step 2 – The Flush
With the roots still in the sink, fill a basin with lukewarm water and let the plant sit for a minute or two. This leaches out the hidden salts from hard water and any excess fertiliser. For UK water hardness, a single flush washes away a significant amount of those accumulated salts. Make sure the water drains freely; you don’t want the roots sitting in standing water.
Step 3 – The Repot
Choose a well-draining mix. Our go-to is the Soil Ninja House Plant Potting Soil (paid link) – a peat-free 10 L bag of coir, perlite and worm castings. If you’re watching the budget, the Westland Houseplant Potting Mix (paid link) is a decent peat-free 4 L alternative and works for most foliage plants. Remember to add a layer of coarse grit (like perlite or pumice) at the bottom of the pot to improve drainage.
Check Westland Houseplant Potting Mix price → (paid link)
Check Soil Ninja House Plant Potting Soil price → (paid link)
Step 4 – The Wait
After repotting, give the plant a dry spell of 7 to 14 days. No watering, no misting. This allows the roots to heal and the plant to recover from transplant shock. During this period, keep the plant out of direct sun but maintain a bright, indirect light level – a south-facing windowsill with a sheer curtain works well in winter.
According to the Royal Horticultural Society, leaching with water is a reliable way to remove mineral salts caused by hard water and over-feeding. Skipping this step leaves the plant battling both salt burn and root rot.
Why Is My Plant Still Drooping? (The Shock Factor)
Your plant is still drooping because it is suffering from transplant shock, meaning its disturbed root system temporarily cannot transport water up the stem. It’s not that the soil is still bad; it’s that the plant is busy repairing its roots. Expect two to four weeks of slow recovery before the leaves perk up again.
- Timeline: Expect 2 to 4 weeks of slow recovery. Leaves may stay limp for the first week, then gradually perk up.
- Light: Keep the light level low to medium – bright indirect is best. Too much sun adds extra stress.
- Humidity: Raise humidity with a pebble tray or a room humidifier (a £10-£15 device is worth the investment).
- Water: Hold off on watering until the soil feels dry to the touch at the surface. Over-watering during shock just prolongs the problem.
A calathea that looks close to collapse after repotting often just needs leaving alone. Resist fiddling with it for a week or two and give it a humid spot, such as a bathroom windowsill where shower steam adds moisture.
Product Spotlight: SB Plant Invigorator (paid link)
View SB Plant Invigorator on Amazon → (paid link)
When you’ve cleared the soil, the next worry is pests that love the damp, nutrient-rich environment you’ve just created. *SB Plant Invigorator (eBay paid link) is a multi-purpose spray that tackles common houseplant pests while giving a mild feed. We’ve found solid results on monstera and pothos – aphids, whitefly and spider mites tend to stay at bay.
The product works by a physical action, meaning bugs can’t develop resistance. That’s a big plus in a flat where you can’t afford a nasty infestation. However, you’ll need to re-apply every week or so; it’s not a one-off miracle. Also, if you over-spray, a sticky residue can develop, inviting mould – something many owners learn the hard way after over-enthusiastic applications.
If you’re on a tighter budget, Doff Universal Bug Control (paid link) is a cheaper 1 L spray. It does a decent job on early-stage aphids and mites, but it can be harsh on delicate foliage and the results are a bit hit and miss. For most casual plant owners, the SB spray is worth the extra few quid for its broader spectrum and gentler formulation.
Check Doff Universal Bug Control price → (paid link)
Product Spotlight: Growth Technology Houseplant Focus (paid link)
View Growth Technology Houseplant Focus on Amazon → (paid link)
After the soil and pests are sorted, a good feed helps the plant rebuild its root network and produce healthier foliage.
The feed is a 1 litre bottle of Growth Technology Houseplant Focus (paid link), mixed as the label directs. If you’d rather keep costs down, the Miracle-Gro Organic Pump & Feed Houseplant (paid link) (200 ml) is convenient, as the pump makes dosing a breeze, but the formula is more generic, so you won’t see the same rapid improvement on stressed plants.
See Miracle-Gro Organic Pump & Feed Houseplant on Amazon → (paid link)
Common Signs of Bad Soil
| Sign | Description | Likely Cause |
|---|---|---|
| Fungus Gnats | Tiny black cloud hovering over soil | Soggy, organic medium |
| Surface Mould | Thin white or grey film | Soil not drying out between waterings |
| Compaction | Soil feels like concrete when pressed | Mix has collapsed into a dense slab |
| White Crust | Powdery ring on surface | Salt build-up from hard water and fertiliser |
| Wilting Despite Watering | Leaves droop even after watering | Roots suffocated by compacted soil |
Ready to Start?
You’ve now got a clear picture of why that new soil turned your plant into a drama queen, and a step-by-step rescue plan that works in a typical British flat. Remember: the key is a gentle root wash, a proper flush to ditch salts, a well-draining mix, and a patience-heavy waiting period.
Don’t let the panic win. Grab our free Houseplant Troubleshooting Checklist – it’ll keep you from missing any other subtle signs of distress and give you a quick reference for future repotting adventures. You can also read through the blog for similar troubleshooting guides.
If you’ve got any lingering questions or need a hand picking the right soil for your specific plant, feel free to get in touch.
You’ve got this. Your plant will be back to thriving, and you’ll have another lesson under your belt – without the guilt of another “mucked-it-up” moment. The best soil lesson: if water pools on the surface for more than ten seconds, the mix is too dense. Swap it out before the roots suffocate.
Related Guides
For a complete overview, see our Houseplant Pests UK: How to Identify and Eradicate Bugs.
References
Products linked above are ones we recommend based on owner feedback and UK-condition testing.
Note: The advice provided in this article is for general informational purposes only. Always verify specific plant care requirements and consult a qualified professional or official source for detailed guidance.